Custom silicone baking mats. Sized, printed and packed for your program.
BakewareLink coordinates custom silicone baking mats for commercial bakeries, distributors and bakeware brands. Define the baking task, finished size and surface first. Then develop the color, printed layout and pack around the product you will approve and order.
Custom size · Smooth or open mesh · Logo & deposit guides · Bulk or retail packing
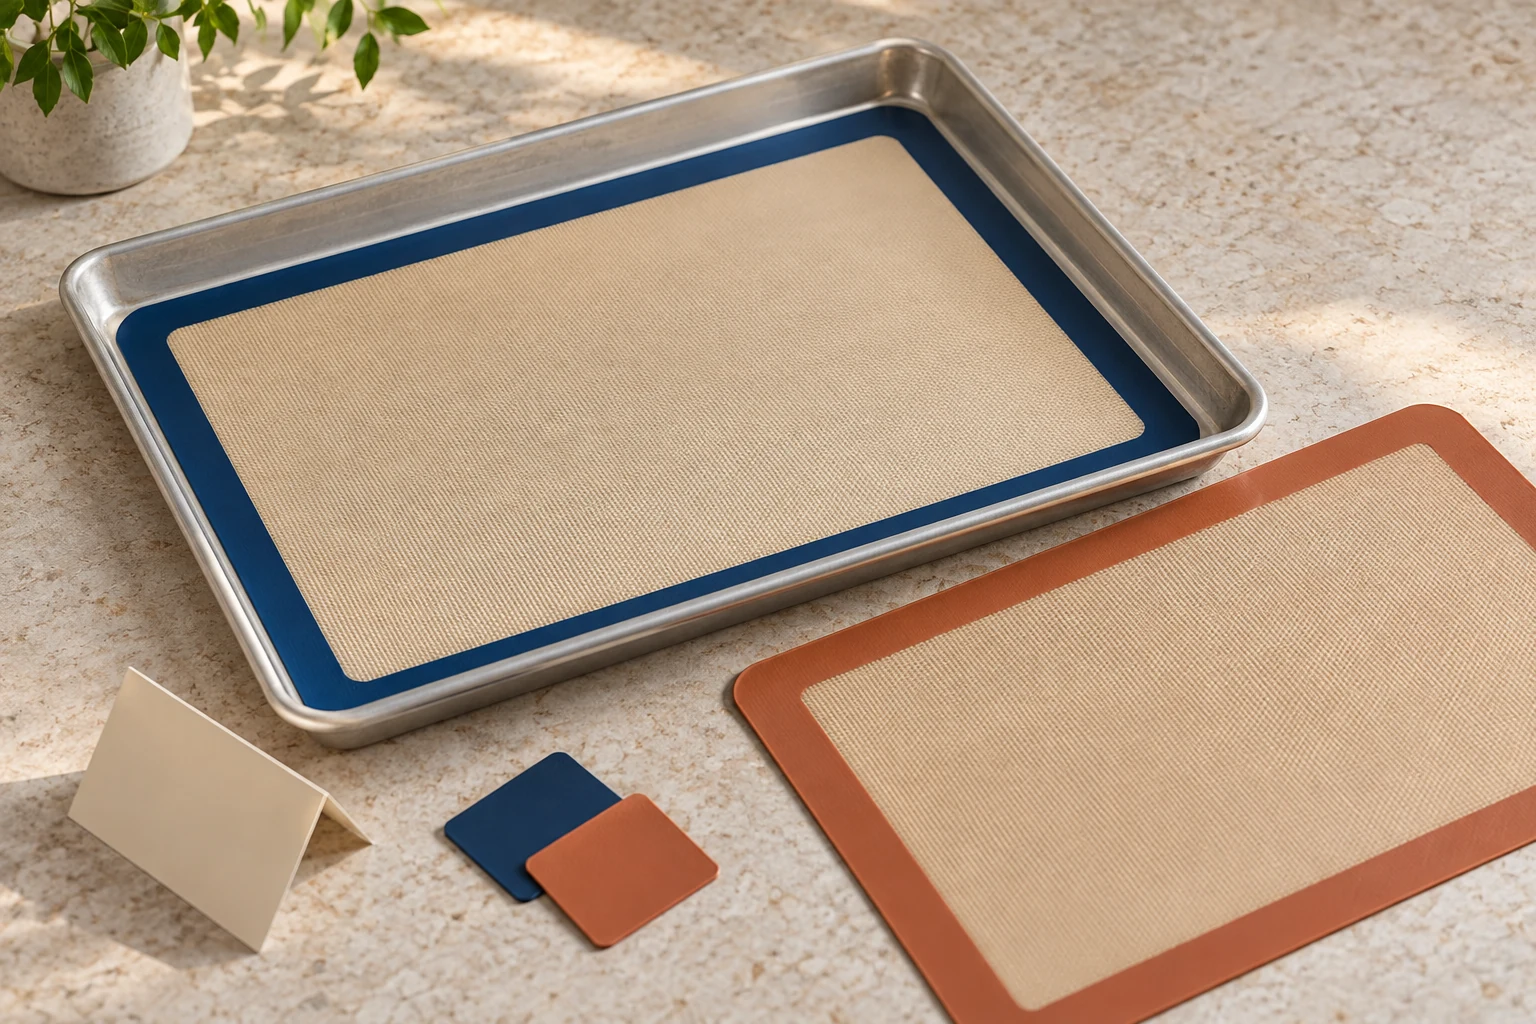
Tray-fit concept illustration. Finished dimensions, construction and colors are established in the approved project specification.
01 / Choose the construction
The surface determines what the mat is built to do.
Custom silicone baking mats are reusable mats specified for a defined size, construction, working layout and supply format. Branding is one part of that specification. A new print does not change a bench mat into an oven liner or a continuous surface into open mesh.
Describe the food and the job before selecting a format: supporting cookie deposits, placing macarons, lining bread trays or rolling dough on a bench. Include the tray, loading method and cleaning routine so selection follows the actual workflow.
01
Continuous surface
Smooth reinforced mats
A continuous silicone working face over woven reinforcement, with a finished perimeter.
Tray lining for cookies, pastry deposits and other products that need a continuous support surface.
Define for your project
Finished outline, thickness, border width, corner profile and the intended release task.
02
Actual openings
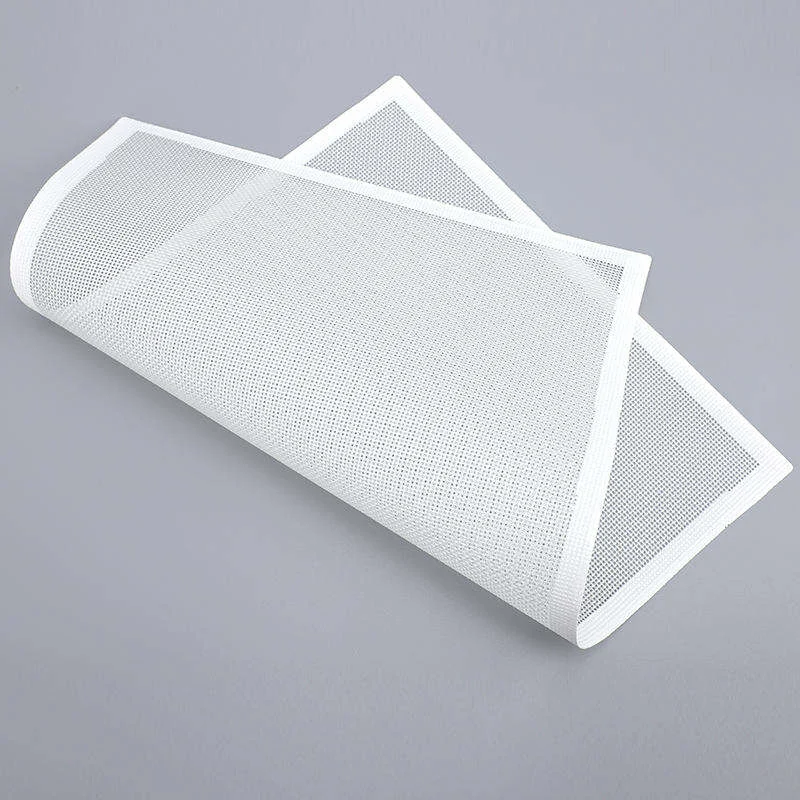
Open-mesh baking mats
Silicone-coated mesh with open spaces through the working area and a finished edge.
Bread and pastry programs where the contact pattern, support and open structure suit the recipe and tray.
Define for your project
Opening pattern, working area, edge construction and sample performance on the selected tray.
03
Positioning guides
Printed deposit mats
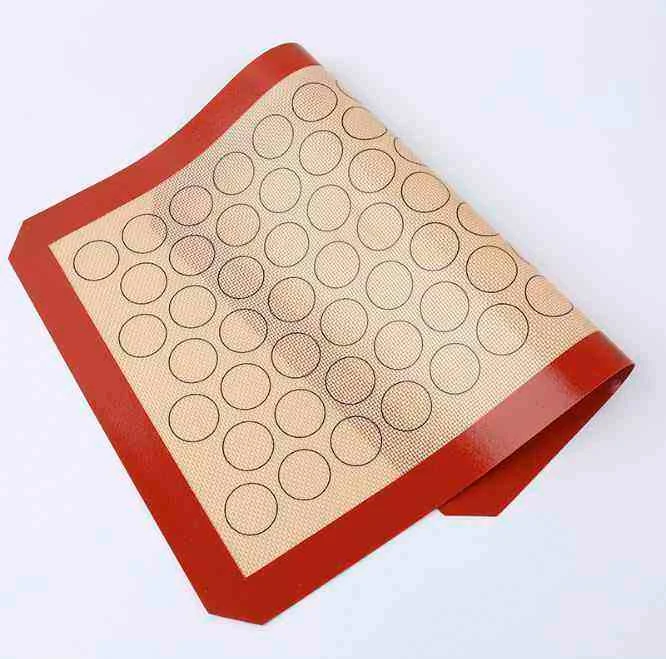
A selected baking-mat construction with a defined circle, grid or deposit layout.
Macaron and portioning programs that need consistent placement during loading.
Define for your project
Circle diameter, center-to-center pitch, rows, columns, margins and print orientation.
04
Bench preparation
Measured pastry mats
A worktop mat with a specified construction and metric, imperial or dual-unit guides.
Rolling and measuring dough, portioning and preparation on a bench.
Define for your project
Work area, units, guide dimensions, surface behavior and the separately confirmed use limits.
Open-mesh construction has openings through the working area. Color is specified independently.
Read the construction correctly
A visible weave is not proof of an open surface.
Reinforcement can remain visible beneath a continuous silicone face. Ask whether the working surface is continuous or has actual openings, then confirm the construction on a physical sample.
For an open-mesh program, specify the opening pattern, edge width and usable area. Evaluate the mat and supporting tray together. The base appearance and release of the baked product need a recipe trial; a photo of the mesh cannot establish those results.
The outside tray footprint determines equipment fit. The flat interior base determines the liner area. Sloping walls, rolled rims and rounded corners make these different measurements. Identify both on the drawing and keep the tray reference with the project.
Specify the finished mat outline in millimeters, including corners, clearance and allowable dimensional variation. Check the sample without pushing it into the walls or folding an edge upward.
Outside tray, flat base and finished mat are separate outlines. Diagram not to scale.
A drawing example
Put the clearance into the finished dimensions.
If a flat tray base measures 430 × 305 mm and the project calls for a 5 mm gap at each opposing edge, the rectangular outline is:
Confirm the corners separately and test the full-size sample. The agreed tolerance must preserve the required fit.
Illustrative dimensions. A 5 mm gap is not a universal requirement for every tray or mat.
The specification that follows the sample into production
Requirement
Define before quotation
Check before approval
Finished size & corners
Length × width in millimeters; corner profile; drawing revision and dimensional tolerance.
Measure the sample and fit it to the actual flat tray base. Check all corners without forcing the mat.
Surface & construction
Continuous surface or actual openings; reinforcement; thickness and perimeter construction.
Compare the face, openings, thickness and edge finish with the accepted product reference.
Working conditions
Food, supporting tray, oven type, cycle temperature and duration, loading and cleaning routine.
Run a representative bake or preparation trial under the agreed conditions.
Color & printed layout
Physical color reference; dimensioned artwork; mark location, scale and orientation.
Check color, registration, guide dimensions and appearance on the physical sample.
Selling & shipping unit
Mats per pack, size mix, sleeve or box, instructions, inner and master-carton counts.
Approve the complete pack and check the mat after unpacking.
Reference sizes are starting points.
Reference formats include 300 × 400 mm, 400 × 600 mm and 420 × 295 mm. Compare the selected mat drawing with your tray’s flat base; a familiar size name does not establish fit.
State which direction is length and which is width when the print or loading direction matters.
Thickness is part of the construction.
Reinforced mat projects can start from 0.60 or 0.70 mm reference constructions. Confirm the selected material build, thickness and tolerance together. Thickness alone does not establish release performance, heating limits or useful life.
Bench-preparation constructions have their own specification and use review.
Order the finished size you need. Do not trim a fiberglass-reinforced mat to correct fit. Cutting can damage its finished perimeter and expose reinforcement. Resolve the outline and edge construction before manufacture.
03 / Logo, color & printed guides
Make the artwork a measurable working layout.
A logo identifies the brand. A circle pattern locates deposits. A ruler measures dough. Each needs its own dimensions and approval check. Supply vector artwork at the intended scale, with the finished mat outline, print position, edge offsets and reading direction.
Identify the intended food contact and heating areas. Select a suitable marking method for the actual surface and use, then approve the printed product. If a molded or recessed mark is requested, review the tooling and product changes separately.
Artwork inputs and physical approval checks
Printed element
Prepare in the artwork
Approve on the sample
Logo or care mark
Vector artwork, final dimensions, placement from the finished edge and reading direction.
Legibility, position and suitability of the marking process for the selected construction and use.
Macaron or deposit pattern
Circle diameter, center-to-center pitch, rows and columns, working margins and loading direction.
The full-size layout fits the usable area and supports the actual deposit method and recipe.
Rulers or rolling guides
Metric, imperial or dual units; scale origin; circle diameters and units shown on the artwork.
Printed dimensions match a separate measuring reference. Review the actual worktop task.
Base and border colors
Separate color references for each area and a retained physical approval sample.
Compare the finished material under agreed lighting, including the effect of the underlying reinforcement.
Deposit guides need a dimensioned pattern, margins and an agreed loading direction.
Macaron & portioning layouts
Circle diameter and pitch are different measurements.
The circle diameter sets the printed reference. Pitch is the distance between neighboring circle centers. Together with the rows, columns and margins, they establish the layout envelope.
Choose that layout around the deposit weight, recipe spread and loading method. Printed circles do not establish the finished baked diameter or a guaranteed yield. Check the full-size print against the artwork, then validate it with a representative batch.
Retain the approved artwork revision and physical sample together. Changes to coverage, position, color or the underlying construction require review before the next production release.
04 / Sample & production approval
Approve the mat through its complete working cycle.
Use an existing-format sample to shortlist the construction. Use a production-intent sample to approve the custom outline, color, print and pack. Record differences between an early sample and the proposed bulk product.
Compare alternatives using the same tray, recipe, deposit weight, spacing, oven program and cooling method. Define acceptable release, base appearance, fit and cleaning results before the trial so approval has a clear basis.
Four checks for a production-intent sample
Stage
What to check
What to retain
Before use
Measure size and thickness; inspect corners, working face and the finished perimeter. Confirm print scale and orientation.
Sample ID, drawing revision, measured values and photographs.
During loading & baking
Use the intended tray and a representative recipe. Hold portion weight, spacing, oven program and cooling method constant for comparisons.
Check release, product-base appearance, removal, residue, flatness and the face and print after the agreed washing routine.
Acceptance results, cleaning method and any changes observed during the planned repeat cycles.
After packing
Unpack the production-intent selling unit. Check count, creasing, surface protection, artwork, instructions and identification.
Approved pack contents, packing method, labels and carton configuration.
Product records must describe the mat being supplied.
State the destination market, intended food contact, oven conditions and required product documents in the brief. Match the record to the actual material, construction, color and decoration. A general catalog statement does not establish the scope for every customized SKU.
Use the selected finished mat’s written heating and cleaning limits. A raw silicone data sheet or a report for a different mat cannot define the operating limit for this configuration. Keep accepted instructions with the drawing, print revision and approval sample.
Before bulk release, align inspection with the approved specification: dimensions, face and edge condition, color, artwork, pack count and agreed checks. Record a discrepancy against the affected variant and confirm the correction and recheck.
05 / MOQ, pricing & packing
Quote each variant and each selling unit clearly.
Quantity is defined by finished size, construction, color, print layout and pack. A mixed-range total does not describe the production quantity of each variant. Printed packaging can also have a separate minimum.
Separate reference samples, custom sample work and print setup from the recurring product, decoration, pack and assembly price. Confirm the delivery scope and the approvals that start production before planning the required arrival.
Product quantity
Pieces and sets are different units.
A two-mat retail pack is one selling unit containing two product pieces. For example, 300 packs require 600 mats. A mixed-size pack also needs a defined quantity for each size.
State the selling-unit count and component quantities together.
Packing method
Approve the mat after unpacking.
Define flat or loosely rolled packing, protection, sleeve or box, care card and pack language. Avoid sharp folds in a reinforced mat. Check the surface and flatness after the packed sample is opened.
Keep pack minimums and any unused printed-material balance visible in the offer.
Shipment data
Identify every size and print.
Confirm units per inner and carton, labels, dimensions and weights. A warehouse should distinguish variants from the carton identification. Retail codes and care instructions must match the actual contents.
Separate bulk bakery supply from a consumer retail set.
A schedule connects sample approval, artwork release, materials, production, inspection and transport. Confirm the accepted specifications, required approvals and commercial start conditions. New geometry, a new print or revised pack materials can change that sequence.
Keep the use instructions and the reorder specification aligned.
Build the care text around the approved construction and practical workflow. Keep the mat supported as specified, within its written operating conditions, and away from direct flame or exposed heating elements. A bench-preparation format needs its own confirmed use limits.
Let the mat cool before cleaning. Use the agreed cleaning routine, remove residue without scraping the coating, and dry fully before storage. Store flat or loosely rolled; keep sharp tools and heavy objects off the surface.
Define when a mat leaves service.
Withdraw a reinforced mat with exposed fibers, torn mesh, damaged coating or a separated perimeter. Do not cut food on it, trim it or repair it with adhesives.
State the agreed inspection points in the care instructions. Avoid unsupported promises of a fixed number of uses.
Review changes before reordering.
Retain the drawing, construction, sample, physical color, artwork, use limits, care text and packing record under one SKU. Link delivered lots and trial feedback to that record.
A change to size, material, mesh pattern, print or pack needs a documented review. Confirm which sample, document or fit checks must be repeated.
Keep the first order separate from the replenishment forecast. Confirm the specification revision, quantity and timing for each new order. For several mat sizes or a wider baking-supply range, align item readiness and carton identification before shipment.
Send the tray drawing, the layout and the working conditions.
Include the proposed finished dimensions, corners, construction and thickness; artwork and color references; quantities by variant; pack contents; destination and required timing. Identify the sample checks and product documents needed for approval.
Custom silicone baking mats can be specified by finished size, corner shape, construction, thickness, color, logo or working guides, and packaging. BakewareLink reviews these requirements against the selected format and intended use. A custom outline, an open-mesh surface and printed portioning guides are separate development decisions.
What size mat should I order for my baking tray?
Measure the flat usable interior base, not just the outside rim. Provide its length, width and corner profile, then agree the finished mat outline, clearance and tolerance. Approve a full-size sample in the actual tray. A tray-size name or outside measurement alone does not establish the correct liner size.
Are smooth silicone mats and perforated mats the same product?
No. A smooth reinforced mat has a continuous working face; an open-mesh mat has actual openings. A visible woven pattern underneath silicone does not establish an open surface. Choose the construction around the food, tray and handling route, then compare samples under the same working conditions.
Can I add a logo, macaron circles or measurement guides?
Yes, suitable printed layouts can be reviewed for the selected construction. Provide vector artwork with final dimensions, edge offsets, orientation and color references. For deposit guides, include diameter, pitch and margins. Approve the physical printed sample and its performance under the intended use and cleaning routine.
Can fiberglass-reinforced baking mats be cut to fit?
Do not trim a finished fiberglass-reinforced mat to correct tray fit. Cutting can damage the finished perimeter and expose reinforcement. Specify the required outline before production and approve the edge construction on the sample. Order a different finished size when the current format does not fit.
What temperature rating applies to a custom silicone mat?
Use the written limits for the selected finished mat, including its construction and decoration. State the oven type, operating temperature and cycle duration in the brief. A raw silicone specification, a different mat’s rating or a bench-preparation description does not establish oven suitability for your product.
What is the MOQ for custom silicone baking mats?
MOQ is quoted per finished size, construction, color, print layout and pack configuration. Identify quantities per variant and whether they are individual mats or retail sets. Printed sleeves or boxes may have separate minimums. The total across a mixed range does not establish the minimum for each variant.
How long does custom mat development and production take?
Timing follows the actual scope: reference samples, custom dimensions, color and print trials, artwork approval and pack-material preparation. Confirm the approvals and commercial conditions that start bulk production, then include inspection and transport in the required arrival plan. A packaging-only change and a new printed construction need different schedules.
What information should I send for a quotation?
Send the application, tray measurements or drawing, proposed finished mat size and corners, selected surface and construction, oven and cleaning conditions, artwork and color requirements, quantity per variant, pack contents, destination and required timing. Include the sample checks and product documents needed for approval.
Project discussion
Start with a clear buying brief.
For a tray-fit project, give the flat interior measurements and corners. For a printed program, identify the logo or guide layout and its final dimensions. Mark the decisions that still need a proposal.
Send your product references, intended use, quantities and destination. Include pack or brand requirements so the quotation covers the unit you intend to buy.